TRS-80 in an FPGA - Finishing Touches
Finishing touches for Big-80 including cassette recording, auto tape start/stop, amber and green screen mode and scan lines!
"Big-80" is an implementation of a TRS-80 Model 1 in an FPGA. In the last post I managed to get it booting, loading a game via cassette and basically working. This post describes some bug fixes, tweaks and finishing touches.
Memory Size Bug
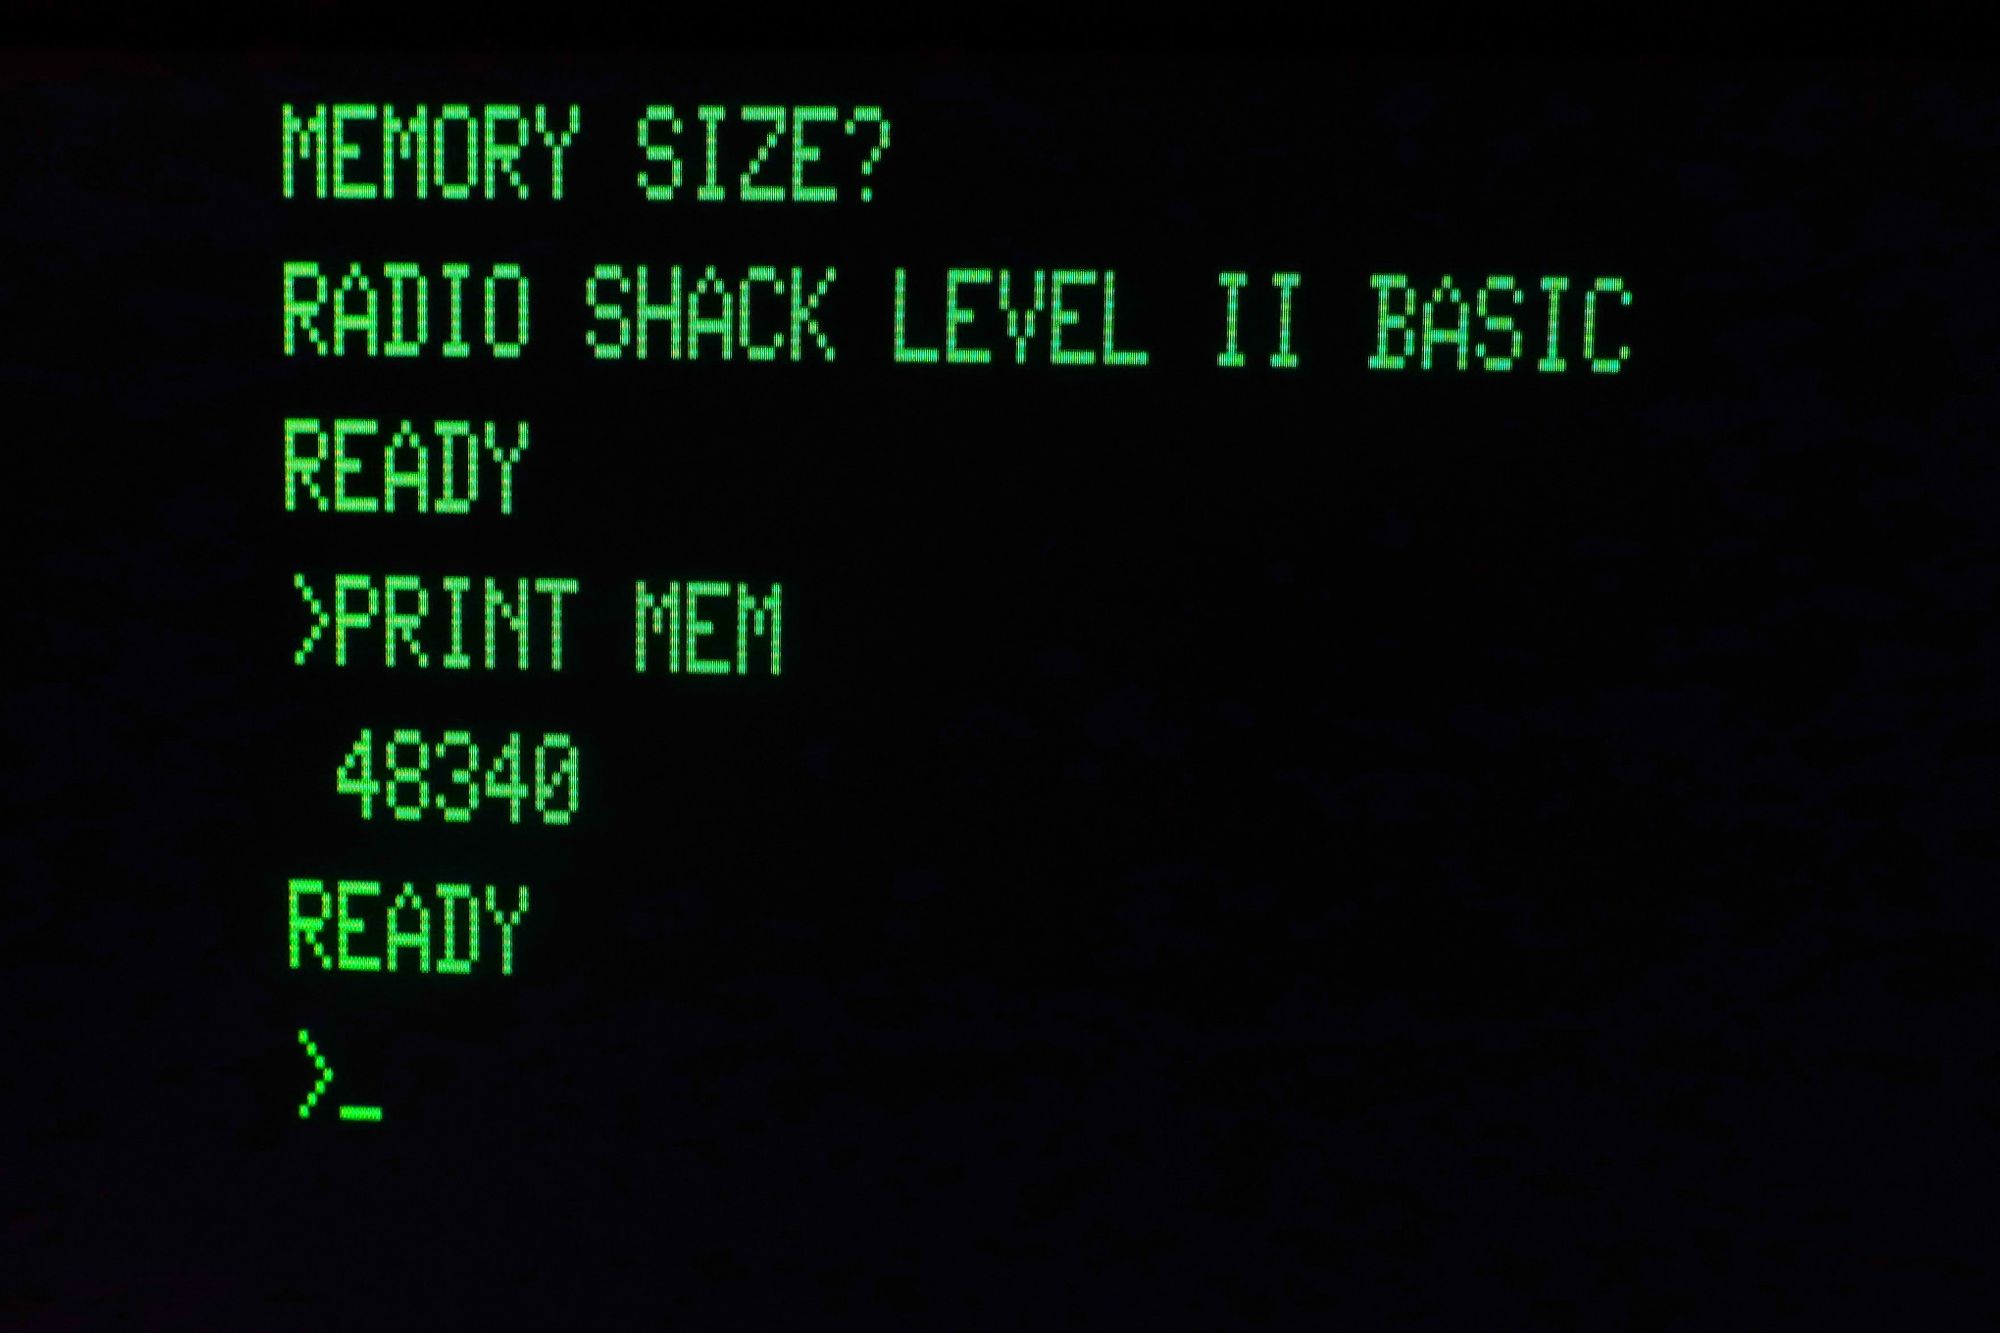
As with any project like this, bugs are expected and there's been a few. The first was that although I'd configured the machine with 16K of RAM, BASIC was incorrectly reporting 48K available.
This was caused by a bug in the memory mapping where I'd incorrectly shadow mapped the 16K RAM three times across the memory space.
I presume BASIC works out how much memory is available by writing to various addresses and checking they retain their value. Because the RAM at those addresses was "working" it thought there was 48K, even though really there was only 16K.
Machine Upgrades
Once I had the machine basically running, a couple of small upgrades seemed appropriate:
- Upgraded the RAM to 48K. I was going to try to do this using the Mimas V2's DDR RAM, but in the end there's enough room on the FPGA itself so I just stuck with that. (last time I upgraded to 48K it involved some intricate soldering iron work and piggy-backed RAM chips - like this).
- Originally I was using a ROM which seems to be from a Dick Smith System-80 (aka Video Genie). I've since switched that out for the original Radio Shack TRS-80 Level II BASIC ROM.
Turbo Tape Mode
As mentioned in the post about implementing the virtual cassette player, if both the CPU and the cassette audio rendering are running from the same clock source it's pretty easy to build a turbo tape mode by over-clocking that common clock.
For this I just re-purposed the 40 MHz clock used for the VGA video timing (source code). A 3-minute long tape now loads in about 8 seconds. If you prefer the genuine slow tape experience, you can turn this off with a DIP switch.
I would have killed for this back in the day. #trs80 loading a tape at 11,200 baud instead of 500. A three minute tape loads in about 8 seconds by over-clocking the #z80 to 40mhz. Because the tape audio render is synced to same clock it just works. #fpga pic.twitter.com/TszAbHrOXV
— Brad Robinson (@toptensoftware) January 3, 2020
What's neat about this is that it's completely automatic since it's tied to the cassette motor relay output:
- When the tape motor is enabled (as during tape play/record) the overclocking is enabled.
- After the tape loads, the motor is turned off and everything returns to normal speed.
Typing Mode
Typing mode is now implemented so that PC keys are seamlessly mapped to the equivalent keys on a TRS-80 keyboard, making typing much easier.
Mostly this was just an exercise in key mapping (source code) with some special logic to force the shift key on/off as required. Again, there's a DIP switch setting to disable this for programs where the physical layout of the keys is important.
Implemented "typing mode" for my #fpga #trs80 to map PC keyboard characters into equivalent trs80 keystrokes. So much easier to type on now. pic.twitter.com/mSP4ZGiNR6
— Brad Robinson (@toptensoftware) January 3, 2020
Screen Nostalgia
For fun I added a couple of DIP switches to switch better green and amber screen colors as well as a simulated scan-line effect.
The scan-lines are implemented by slightly reducing the color intensity (source code) on the first and third VGA pixel rows of each TRS-80 pixel (remember pixels are tripled vertically to get the right aspect ratio).
How would you like your #trs80 monitor? Green screen or amber? With or without scan lines?#z80 #retrocomputing pic.twitter.com/qay3qfzWWe
— Brad Robinson (@toptensoftware) January 5, 2020
Graphic Character Generation in Logic
When I first implemented the video controller I used a 4K ROM that had bitmaps for every character - including two copies of the graphics characters.
I've since changed this to generate the graphics characters in logic (source code) - just like a real TRS-80. This also let me trim down the character ROM to 2K.
Instead of wasting 2K of #fpga block ram (the horror!) for the graphics characters, the video controller now generates them in logic - just like a real #trs80 :) pic.twitter.com/y693zHzwDg
— Brad Robinson (@toptensoftware) January 4, 2020
Run/Stop Switch
Before I implemented the graphic character logic described above, there was a weird artifact happening on the boundary of graphics characters - a vertical line of slightly brighter pixels.
Since it only seemed to happen on moving graphics, I added a DIP switch to pause the main CPU clock (source code) so I could take a closer look.
Added a run/stop switch because I thought I could see some video artefacts in games and wanted a better look. But I think it was my imagination. #trs80 #fpga pic.twitter.com/PAVx35vcdi
— Brad Robinson (@toptensoftware) January 4, 2020
When paused the effect went away so I left it to revisit later, but since changing the way graphics characters are generated the problem seems to have disappeared - but I've kept the run/stop switch anyway.
Media Keys
The PS2 keyboard I'm using for this project has a row of "media keys" along the top edge. I figured it'd be nice to use some of these for controlling the TRS-80 so I've mapped:
- Power = reset the machine
- Next/Previous Track = virtual cassette number selection
- Play/Pause = start/stop the virtual cassette player

This was mostly a simple matter of mapping key presses from the PS2 keyboard to the required action (source code) - although I had to use a small internal counter for the soft reset. When the power button is pressed the internal reset signal is held high for 16 ticks (source code).
Cassette Recording
Originally, I wasn't going to implement cassette recording but since it was the one major piece of missing functionality I decided to just get it done.
The virtual cassette recorder is essentially the opposite of the player: while the tape player takes data bytes from the SD card and renders audio, the tape recorder takes an audio signal and produces a stream of bytes to be written to the SD card.
- Monitor the audio signal for edges, measuring the time between those edges to work out data bits.
- Watch for the first 1-bit and assume it's the MSB bit of the leading 0xA5 sync-byte and use it to synchronize the byte boundary.
- Push the bits through an 8-bit shift register to produce bytes.
- Buffer those data bits into 512 byte blocks ready to be written to the SD card.
- Generate write operations to the SD card.
The main trick to this working is getting the audio parser to synchronize to the byte boundary when it sees the first 0xA5 byte. In practice it just looks for the first 1-bit and assumes it's the MSB of a byte boundary and syncs to that (source code)
Before syncing, all that will be seen are zero bits. In order to not lose most of those header bytes, for every 8 zero-bits received, a zero-byte is generated. Once the first 1-bit is seen the byte boundary is known and any partial zero-byte already received it discarded.

Unlike playback which can be stopped at anytime, the recording needs a more controlled shutdown to flush the final partially filled buffer. A couple of control signals were added to the streamer component to handle this - one to request that it stop, and one outgoing signal to indicate that it had finished (source code).
Implementing all this wasn't without issues - mostly because I decided to learn how to use the FPGA board's serial UART capability at the same time. Besides implementing the recording capability I also implemented a UART transmitter module (source code) and figured out how to monitor it from a Linux dev machine:
Here’s a clip of the fpga transmitting a 1 byte per second incrementing counter, logging it in a terminal and also capturing it with a logic analyzer. Learned a lot. End. pic.twitter.com/zrwXSskfSf
— Brad Robinson (@toptensoftware) January 10, 2020
I wasted a lot of time on this thinking that I had a bug in my logic, only to discover that serial port receiving in Linux under VirtualBox is completely broken (lodged a bug report here). To work around it I wrote a serial hex dump utility that works under Windows (it's here if you want it)
I finally got it working though and the virtual cassette player now works like an old school tape player: press the play button to play, press the play and record buttons together to record.
Video RAM Bug
The first build after integrating the new cassette recorder, produced some unexpected results - the video controller completely lost the plot:
Tonight after making some changes to my #fpga #trs80 got this mess. I think what happened is the video ram got moved to block ram and a missing clock enable highlighted an already existing problem. Fixed now. Not sure how it worked before. pic.twitter.com/yYdZqwxAkl
— Brad Robinson (@toptensoftware) January 13, 2020
I'm pretty sure what happened here is as the design grew, the tools changed how the inferred video RAM was implemented and moved it from distributed RAM to block RAM - which caused the problem to appear.
The actual problem was a missing clock enable signal on the video RAM. It's fixed, but I don't really understand why it worked before.
BASIC Programs Not Loading Bug
Another distraction I had while getting the cassette recording working is that I hadn't noticed that BASIC programs weren't loading from tape - even though machine code programs we're loading fine. I thought the save feature was failing but really it was the load.
This took a fair bit of work to diagnose (along with some experiments in an emulator to figure out what was going on). Turns out that BASIC is sensitive to the length of the cassette audio pulses and the cassette rendering components were producing them a little too short.
At one point I thought it might have been looking for the negative part of the pulse so I've implemented that too (source code) - but I think in the end it just needed a longer pulse.
Automatic Cassette Control
I was thinking about how to use the cassette motor relay to start and stop the virtual cassette player. The question is whether to start recording or start playback? I figured I could make this automatic.
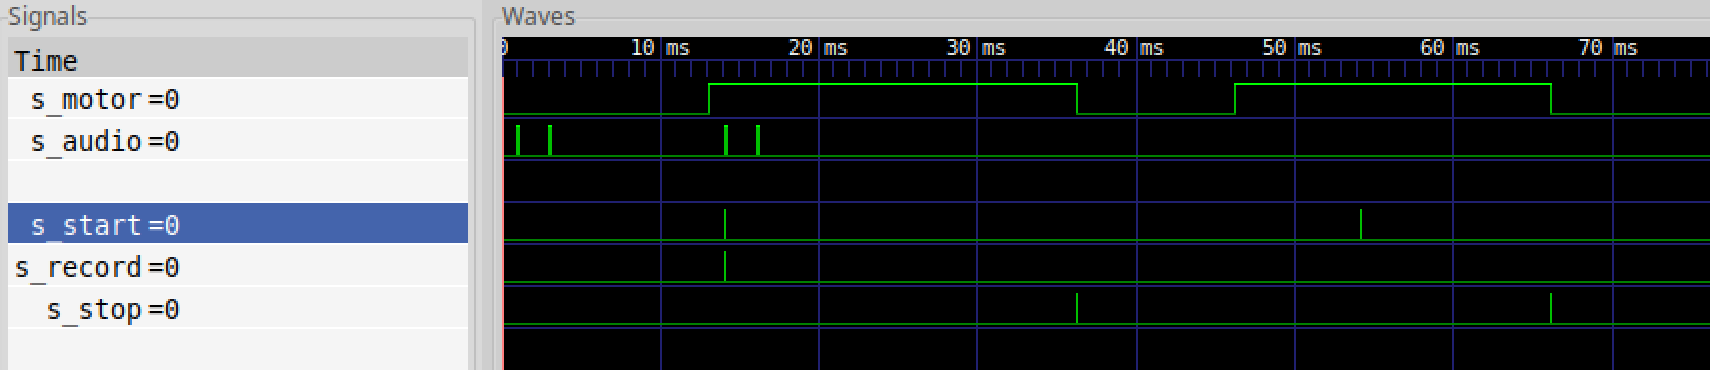
When the cassette motor is turned on (ie: when you start any save or load operation in the TRS-80) the audio output signal is monitored for a about 5 milliseconds. If audio activity is detected the cassette player is started in record mode, otherwise playback mode. (source code)
Note this will probably cause the first bit to be dropped but given the long lead-in of zero bytes it really doesn't matter.
I thought there would be delay between when the cassette motor is turned on and when the audio generation started, but after checking with a logic analyzer it doesn't - it's within about 100us or so:

This automatic cassette control combined with high-speed tape mode it makes working with cassettes really easy:
This is working _really_ well now. Check it out: 1. High speed tape mode, combined with 2. New ability to record and 3. Auto starting the cassette in either playback or record mode as required. Who knew cassette could work so well? #fpga #trs80 #z80 #retrocomputing pic.twitter.com/5KFGhPbrUK
— Brad Robinson (@toptensoftware) January 14, 2020
Wide Character Mode
TRS-80's have a 32-column wide character mode. It's rarely used, but since I was going for a complete Model 1 I decided to implement it.
Nothing too exciting here and all it involved was some tweaks to the video controller to only draw every second character and to draw them twice as wide.
#fpga #trs80 now supports 32-column mode. pic.twitter.com/TYq2hz7Nwl
— Brad Robinson (@toptensoftware) January 14, 2020
Functionally Complete!
Big-80 is now a functionally complete cassette based TRS-80 Model 1.
At this point it's tempting to start thinking about disk drives, high-res graphics etc... but I've decided to resist and keep the project as simple as possible. The code base is reasonably simple and elegant and to enhance further would complicate it - and to complicate it would spoil it.
I've also written up some documentation and usage instructions - which are available here, along with source code and a pre-build .bin file for the Mimas V2 FPGA board.
So that's it. Big-80 is done!
However... the main point of this project wasn't to just build an FPGA TRS-80. I was also hoping to improve my FPGA development ability and process. I'll talk about that in the next post.
Have thoughts on this? Leave a comment on Twitter.