How to Write a Compiler #6 - Testing
For language products typical unit testing doesn't work well long term. Instead I recommend sandboxing for early prototyping and a dedicated test case file runner for more end-to-end style testing.
On other language-based projects that I've worked on I've found that coded unit tests are cumbersome and a better approach is end-to-end testing with a dedicated test runner.
This post describes the approach I've taken with C-minor.
Starting with Sandboxing
For this project I didn’t want to waste time writing a comprehensive set of unit-tests for the tokenizer and parser as I knew those tests would soon be superceded by end-to-end testing.
Instead, I used a throw away sandbox program to exercise these parts to confirm they were basically working. Along with an AST formatter, I then had all the pieces required to build a custom test runner.
Requirements for a Testing Framework
The main thing I wanted to avoid with testing is the need to embed C-minor programs as strings in C# test case code because:
- it would require escaping C-minor code as C# strings.
- it's hard to correlate line numbers in error messages from the C-minor compiler to line numbers in an embedded string.
In other words, the source C-minor code had to come straight from a file.
Besides the C-minor program I knew the test cases would also be working with other blocks of text including reformatted AST listings, error messages from the compiler, generated code, perhaps assembly listings and the output from running a C-minor program.
Here’s the final requirements I decided on for the test cases:
- a test case file that included an input C-minor program
- line number error messages should match directly with the input program source code file
- ability to work with other blocks of text - including output from the compiler for diagnostic purposes and other blocks of text to be tested for correct output
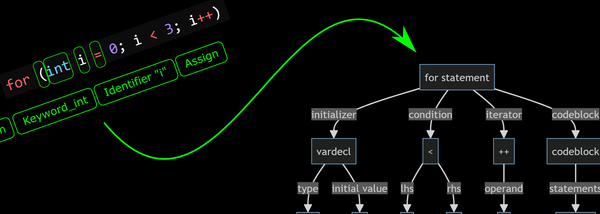
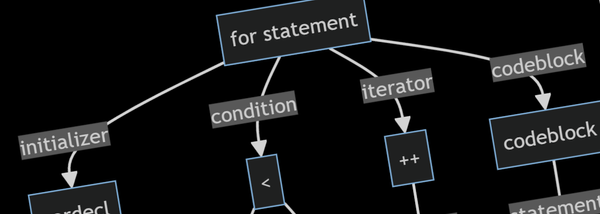
- ability to list the input program’s AST and compare to an expected AST
- ability to check the output of a C-minor program to confirm correct behaviour
- ability to check for expected compiler error messages
- ability to show actual results when they don’t match expected results
- ability to produce diagnostic listings including generated code and post-processed AST listings
- the test runner should be able to run individual test cases or a whole recursive directory of test cases
- the test runner should be a console mode app so it can be run on any platform and from within a coding editor such as VS Code
- the output of the test runner itself should be minimal just listing failed tests
C-minor Test Case File Format
The file format I decided on for the test case files is extremely simple:
- at the top of the file is a C-minor program
- this is followed by sections of text delimited by section headings each starting with
##.
A TestCaseFile utility class (see here) provides support for loading a file, splitting it into sections, methods to add/remove and replace sections and then write it out again.
Testing the Tokenizer and Parser
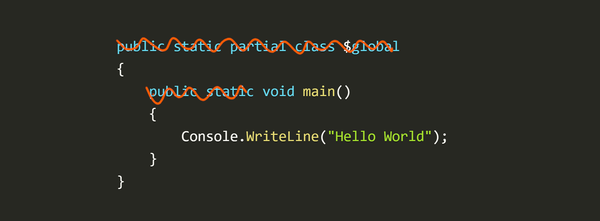
To test the tokenizer and parser the test cases support a section named ## Expected-Raw-AST. When a test contains this section the test runner parses the code section to an AST before reformatting it back into code and comparing it to the expected AST.
// C-minor program at the top
void main()
{
    // Print a message
    Console.WriteLine("Hello World");

    /* Notice comments have been stripped below */
}

## Expected-Raw-AST
void main()
{
    Console.WriteLine();
}
If the AST matches, the test passes and there's nothing else to do. If the test fails (as the above example would), the test runner adds a## Actual-Raw-AST to the test case file:
// C-minor program at the top
void main()
{
    // Print a message
    Console.WriteLine("Hello World");

    /* Notice comments have been stripped below */
}

## Expected-Raw-AST
void main()
{
    Console.WriteLine();
}

## Actual-Raw-AST
void main()
{
    Console.WriteLine("Hello World");
}
From here, there's two possibilities:
- There's a bug in the tokenizer/parser. Once fixed the test can be re-run, the expected AST will match and the
## Actual-Raw-ASTsection will be automatically deleted by the test runner. - Or, there's a mistake in the test case and to fix it I can just copy the Actual AST to the Expected AST section and the test will now pass.
By having the actual AST added right there to the file, everything about the test is contained to one file. It also makes for an easy way to setup these tests:
- Create the input program
- Add an empty
## Expected-Raw-Astsection - Run the test, it will fail and the test runner will add the
## Actual-Raw-Astsection - Review the actual AST to ensure it's correct
- Copy the actual to expected AST
(Note: the reason it's called the "raw" AST is that later we'll be doing manipulations on the AST to produce a post-processed AST. Using the prefix "raw" keeps the two AST's separately testable by the test runner)
Testing for Errors
It’s also important to test the compiler generates correct error messages when it should. To support this, the test case can include an ## Expected-Error section.
If the compiler doesn't generate this text as an error output, the test runner adds an ## Actual-Error section with the errors that were actually generated (if any).
void main()
{
    Console.WriteLine("Hello World")
}

## Expected-Error
error: code(4,1,4,2): syntax error: expected ';', found '}'
Just like the AST sections the ## Actual-Error section makes it easy to initially setup these tests.
Project Structure Overview
We're now almost at the point where we can actually run some tests, but first let's have a look at the project structure and where everything lives.
For this project I've decided to split things into a few top-level projects:
Topten.CMinor.Compiler- the compiler itself as an assembly (.dll)Topten.Cminor.FrontEnd- a command line program for launching the compiler (cmc.exe)Topten.Cminor.Runtime- the .NET API to the runtimecmrt.dll- the actual (runtime written in C)
(I haven't covered the runtime yet, but I've included it here for completeness)
The Topten.CMinor.Compiler project contains everything related to actually compiling code. It also includes a Compiler class that wraps all the compilation stages - see here.
Here's an example of using the compiler to parse a file (or string) and render it as an AST:
// Create an instance of the compiler
var c = new Compiler();

// Pass compiler messages to console
c.OnMessage = (m) => Console.Error.WriteLine(m.ToString());

// Add files to be compiled
c.AddFile("myfile.cm");

// Or, add code from a string
//c.AddCode("void main() {}", "mycode.cm");

// Parse it
c.Parse();

// Render AST
c.RenderAST(Console.Out);
The Test Runner
All the pieces are now in place for building and running tests:
- the
TestRunnerclass (see here) in theTopten.Cminor.Compilerproject loads a test case file, and then drives theCompilerclass to actually run the tests. It does this according to theExpected-XXXsections it finds in the test case file. - the front-end (cmc.exe) supports loading C-minor test case files (these have
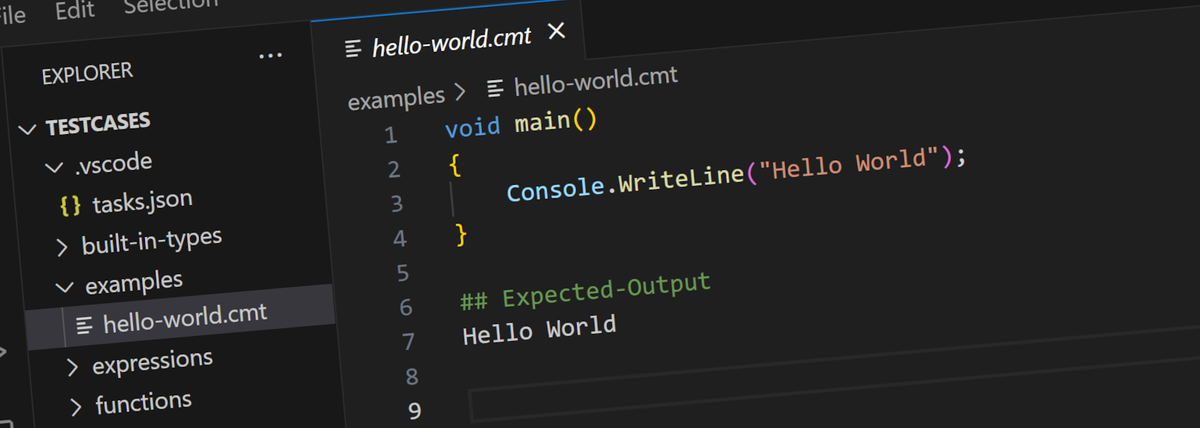
.cmtfile extension). For.cmtfiles the front-end uses theTestRunnerclass to run the test instead of compiling or running the file directly (as it would for.cmfiles). - the front-end can run an entire recursive directory full of
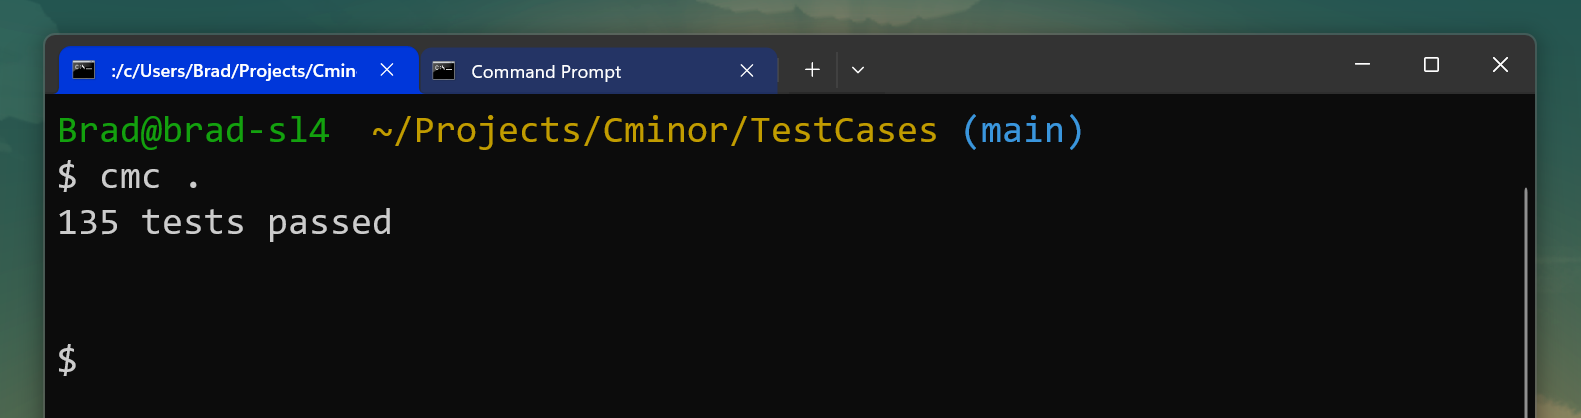
.cmtfiles to run a comprehensive set of tests with one command.
Using VS Code to Develop and Run Tests
To make running tests a little easier, I setup a couple of VS Code tasks:
{
    // See https://go.microsoft.com/fwlink/?LinkId=733558
    // for the documentation about the tasks.json format
    "version": "2.0.0",
    "tasks": [
        {
            "label": "Run Current Test",
            "type": "shell",
            "command": "cmc ${file}",
            "problemMatcher": [],
            "group": {
                "kind": "build",
                "isDefault": "**/*.cmt"
            }
        },
        {
            "label": "Run All Tests",
            "type": "shell",
            "command": "cmc .",
            "problemMatcher": [],
            "group": {
                "kind": "build",
                "isDefault": true
            }
        }
    ]
}
By putting this in a .vscode directory in the base test case directory I can:
- Open a
.cmtfile and pressCtrl+Shift+Bto run it with the test runner. Any changes made by the test runner (eg: adding anActual-XXXsection for a failed test) will automatically be reloaded by VS Code and appear immediately.
Close all files and press Ctrl+Shift+B to run all the tests in the directory. This produces a list of files that failed in the output window that I can Ctrl+click to open them and see what went wrong.
Testing in Action
Here's a video showing the test runner in action.
Time to Get Testing
The approach I've taken to testing with C-minor is a custom test case file that's updated with detailed information by the test runner when a test fails. The output of the test runner is just a list of failed tests and a couple of tasks makes it easy to run individual or the entire test set from within VS Code.
From here on, these test case files will be central to everything I do with the compiler. I might use sandboxing for testing and experimenting with one-off things for the runtime, but anything related to the compiler itself will be developed and tested using these tests case files.