Why I'm Building an FPGA TRS-80
Over this holiday season I decided to implement an FPGA version of a TRS-80 Model 1. This has been done before so you might be wondering why? Well, there's a couple of reasons...
Over this holiday season I decided to implement an FPGA version of a TRS-80 Model 1. This has been done before so you might be wondering why? There's a couple of reasons...
Improving My FPGA Development Skills
The main purpose of this project was to improve my FPGA development skills. I learned the basics of FPGA development while building FPGABee but I was completely new to it and picked up some bad habits.
Starting a fresh project seemed like a good way to clean up my act and put into practice everything I've learned so far. Here's some things I wanted to focus on:
- Proper and consistent clock, clock enable and reset handling
- Avoiding multiple clock domains where possible
- Consistent naming conventions for components and signals
- Appropriate use of VHDL types (ie: not logic vectors everywhere)
- Using generics and constants for improved re-usability
- Building a library of re-usable, properly documented components
- Getting better at using simulation for testing (and keeping those projects)
- Isolated testing of components (and keeping those test projects too)
A Better Development Process
I've been through a couple of different development environments for FPGA projects:
- Originally I used Xilinx ISE Design Suite - the IDE provided by Xilinx for working with their FPGAs. I'm not a big fan: it's big, complicated, produces tons of files in your project directory that need to be excluded from version control and overall the GUI is fairly daunting.
- For FPGABee I moved to make files and Sublime Text. This was an improvement however the make files required manually listing out all the source files and setting up a new project was tedious. Also I never integrated the build into Sublime Text so I was always switching to a terminal to run the build and switching back to the editor to fix errors. I preferred it to ISE, but it wasn't very streamlined and I never really found a good way to run simulations with this approach.
In both cases uploading to the FPGA board was a separate step requiring firing up either a GUI program or running a separate command line tool.
This time around I've developed a new tool called "xilt" (as in "XIL"inx "T"ools). It's a NodeJS based command line tool that can:
- Invoke all the Xilinx tools required to build an FPGA project from source code to .bit file.
- Filter the output to produce a more readable and concise summary of errors and warnings.
- Scan a set of source files (based on a file glob pattern) and generate a list of a dependent files based on a few simple naming conventions.
The idea is to combine xilt with a makefile that can automatically figure out all the files required and then build the entire project. Hopefully everything will be driven by convention and creating a new project will be almost trivial (this will be important to improving my use of test and simulation projects).
Other improvements I'll be working on:
- automatically uploading to the FPGA board
- easily running simulations and viewing results
- invoking the build actions (build, upload, run simulation) from within the editor. I'll be using VS Code this time
- report errors in the editor with VS Code's problem matchers
- improving how I manage Xilinx CoreGen projects
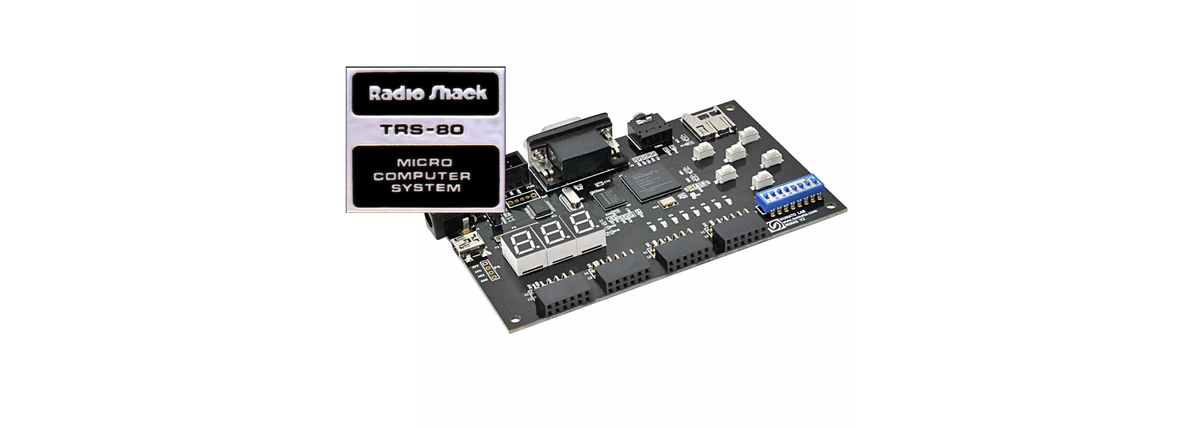
Learning the Mimas V2 Development Board
A couple of months ago I picked up Numato Lab Mimas V2 development board but hadn't really had a chance to play with. While I could have just ported FPGABee to it I was looking for something fresh to work on.
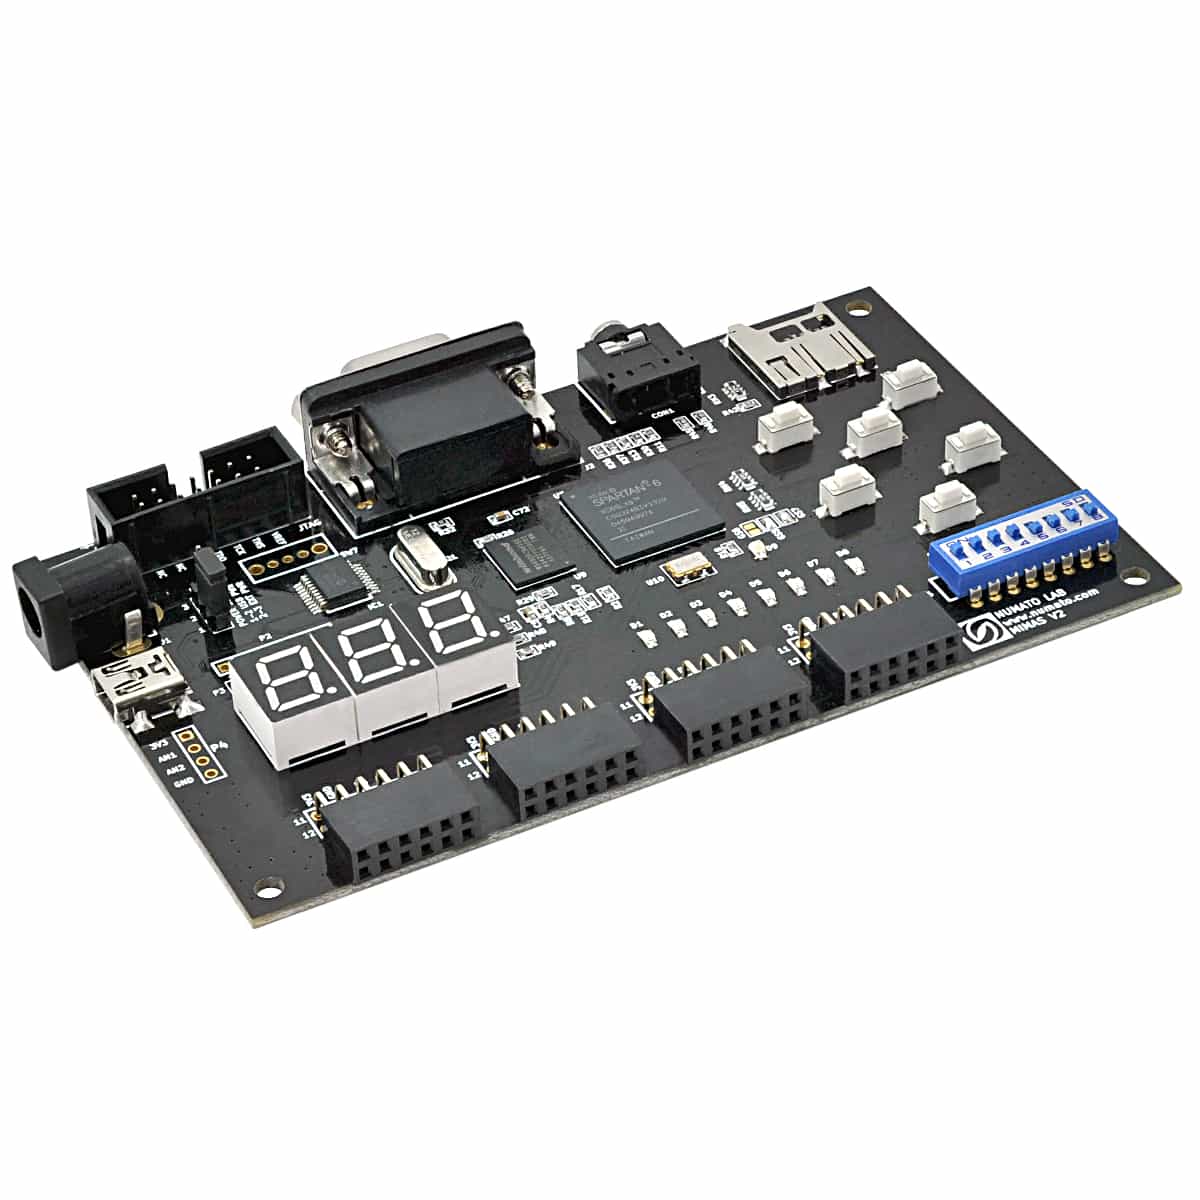
The Mimas V2 is an entry level, extremely well priced and quite capable development board. But it's really hard to tell how well it works in practice until you, well, work with it in practice.
An FPGA TRS80 seemed like a good project to put the Mimas through it's paces.
Project Features
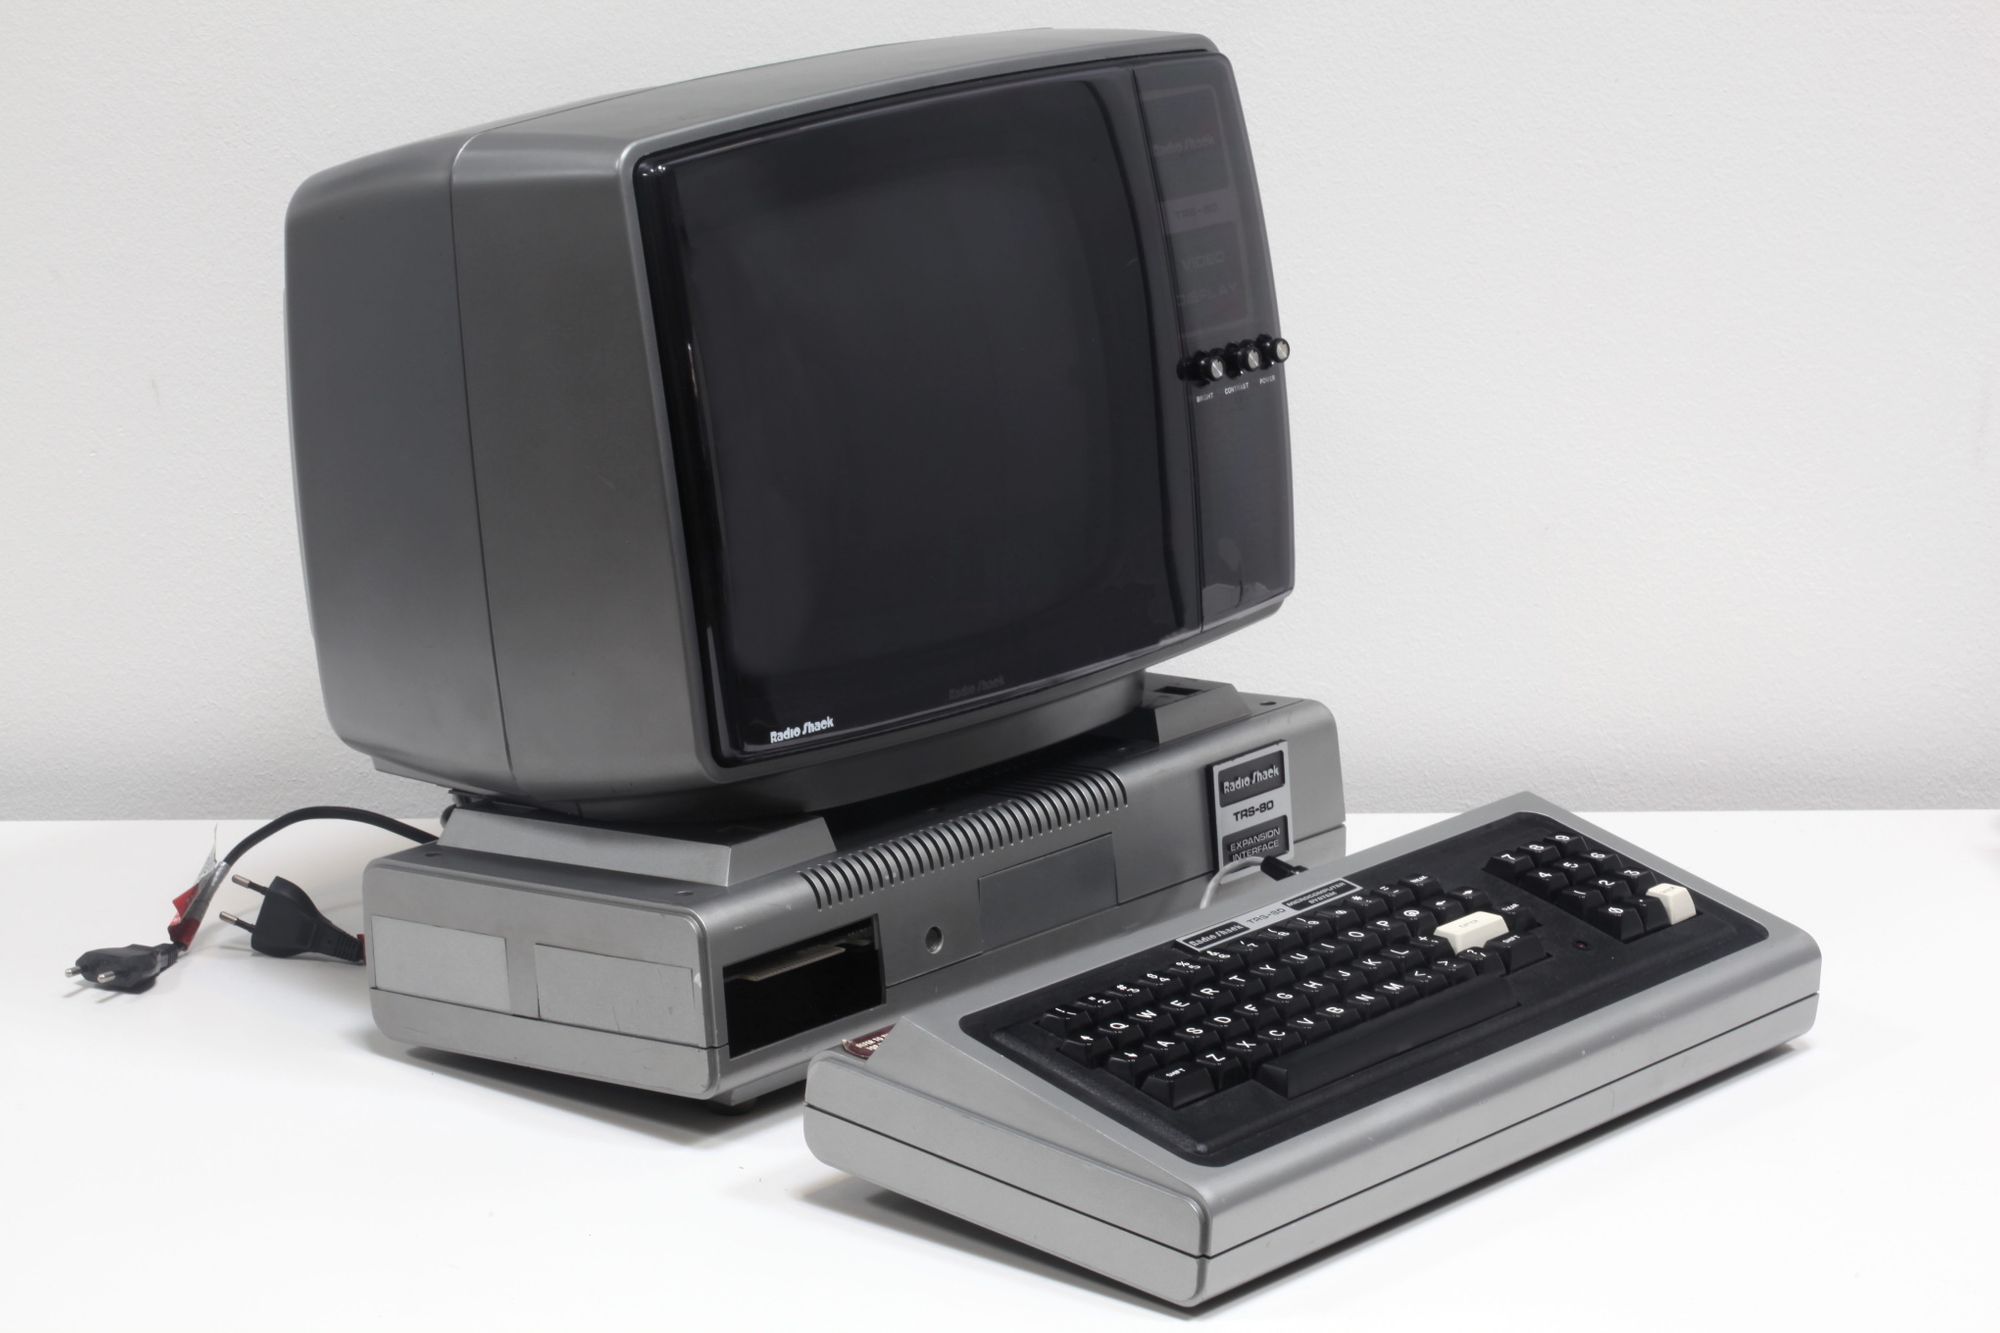
So having decided to go ahead with this project I wanted to constrain it enough that it wouldn't get out of hand and decided the goal would be a TRS-80 Model 1 with just enough to play games.
- Z80 CPU - using the OpenCores T80 core
- 12K Level II Basic ROM
- 16K RAM
- Video Controller - with VGA output
- Keyboard Input - from PS2 keyboard
- Ability to load a cassette image from an SD card
- Sound
I chose the TRS-80 because I already know it well and even though it's a really simple computer there's enough substance there to challenge all of the above goals. Also, there's a certain nostalgia to implementing an old home computer instead of a bunch of arbitrary blinking LEDs.
What to Call this Project?
I was trying to think of a fun name for this project. "FPGATRS-80" and all its permutations are terrible and those nine syllables don't exactly roll off the tongue.
In the end I decided to go with "Big-80". It's a nod to Big Five Software who developed some of the best TRS-80 games back in the day.
Stay Tuned!
In the next three or four posts I'll be giving a high level overview of implementing the various sub-systems - video controller, keyboard interface, cassette audio rendering, etc...
I won't be going into excruciating detail in these posts, but source code will be available. I just want give an idea as to what's involved in developing a project like this, to show things working as they're completed and describe how I tested each piece.
After that I'll probably do couple of follow up posts and see how well I hit the above goals.
Stay tuned, more Big-80 stuff coming soon :)
Have thoughts on this? Leave a comment on Twitter.