Booting Multiple Windows Installations from a Third-Party Boot Manager
Configuring the Windows boot manager so third-party boot loaders can directly load different versions of Windows.

When you install multiple copies of Windows on machine, Windows updates it's boot manager configuration so that at boot time you can choose which version you want to run. This works fine if you're only running Windows...
If you're using a third-party boot manager like Grub or rEFInd it's less than ideal because it becomes a two-step process - first you need to choose Windows Boot Manager and then from the Windows boot manager choose which version of Windows.
But wait, it's even worse than that. If you choose the non-default Windows installation the Windows boot manager reboots the machine before launching the selected operating system... so you need to go through your first boot loader again.
On my machine, getting into Windows 10 went like this:
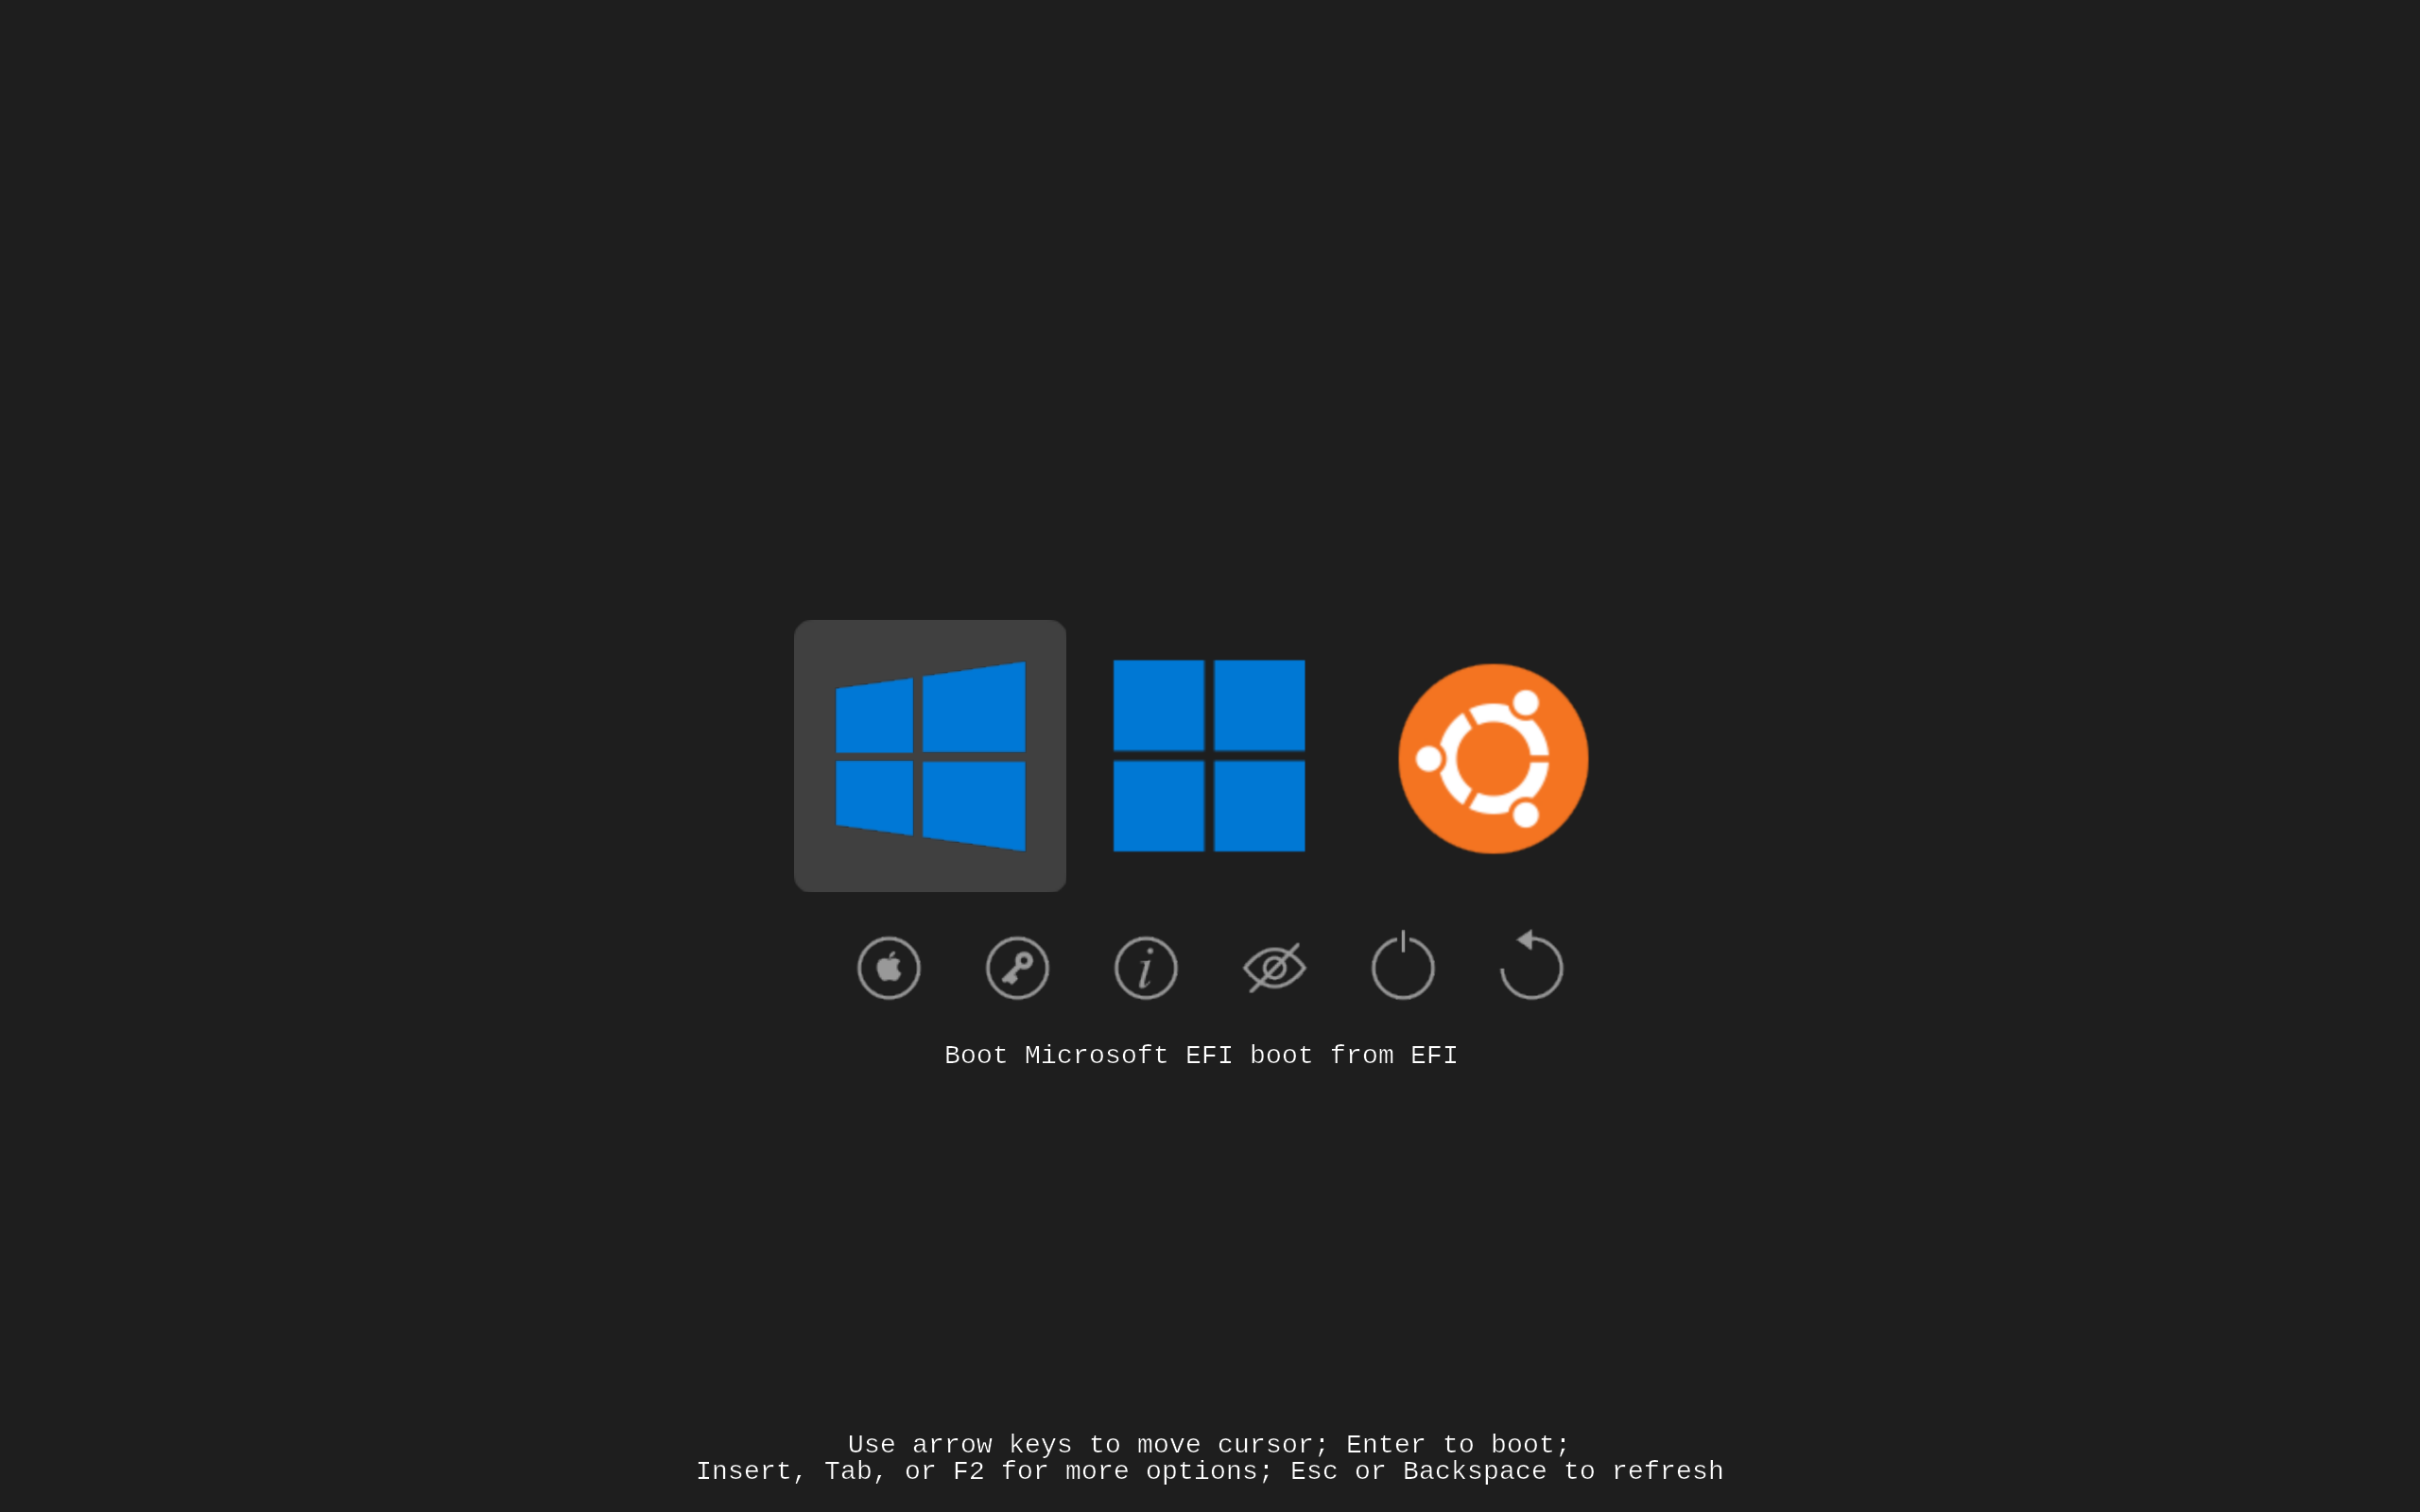
- Machine boots, rEFInd menu appears with Windows and Ubuntu options
- Choose Windows
- Windows boot menu appears, with Windows 10 and Windows 11
- Choose Windows 10
- Machine reboots and goes back to the rEFInd menu again
- Choose Windows again
- Windows 10 boots.
What's needed is a way to split up the two Windows entries so other boot loaders can see them as separate operating systems.
A Little Background
On EFI systems there's a special partition called the EFI System Partition (aka the ESP). This FAT32 formatted partition stores the boot loaders for all the installed operating systems.
On a Windows machine you can get to the ESP with the following command from an Administrator command prompt.
> mountvol b: /s
If you inspect the folder b:\EFI you'll see folders for each of the installed operating systems and boot tools.
The Windows boot loader is in the folder b:\EFI\Microsoft\Boot . Inside that folder is a file BCD that stores the boot configurations for the installed versions of Windows.
The problem is that third party bootloaders typically create menu entries based on the folders found in the EFI directory. Because there's only one folder for Windows only one menu item appears. The trick is to create two separate folders for Windows - each booting a particular version.
Note that all this only applies if the second installation of Windows found the original ESP and updated it. If you disconnect the original ESP drive when you install the second version of Windows it'll create a new ESP on the installation drive and your boot manager should find both when you reconnect the original drive. In this case you'll automatically get two menu entries.
The Fix
The basic idea here is to create two copies of the Windows boot loader folder and edit the contained BCD file in each to only reference one installation of Windows instead of both.
The following assumes you're using rEFInd and I've only tested it with rEFInd. The same approach should work with other boot managers but might require additional configuration of the boot manager.
Assuming you have Windows 10 and Windows 11 installed, here's how you can split the Windows boot loader:
- Make sure you know what you're doing. If you mess up the ESP you can end up with an unbootable machine. Be careful.
- Mount the ESP as described above
- Create two copies of the
b:\Microsoft\Bootfolder asb:\EFI\win10andb:\EFI\win11. eg:xcopy /s b:\EFI\Microsoft\Boot b:\EFI\win10xcopy /s b:\EFI\Microsoft\Boot b:\EFI\win11
(Note these folders must be in the\EFIfolder, and not in the\EFI\Microsoftfolder otherwise rEFInd won't find them). - List out the contents of the BCD file with this command:
bcdedit /store b:\EFI\win10\BCD /enum.
You should see three entries: one titled "Windows Boot Manager" and two titled "Windows Boot Loader" (one for each installed version of Windows). Note of theidentifiervalue listed under each boot loader entry - you'll need these for the next two steps. - Remove the Windows 10 entry from the Windows 11 folder:
bcdedit /store b:\EFI\win11\BCD /delete {ID_FOR_WIN10}. - Vice-versa for the other OS:
bcdedit /store b:\EFI\win10\BCD /delete {ID_FOR_WIN11}.
You'll now have two new, but separate boot folders for each version of Windows. Since each folder is now only configured for just one operating system the Windows boot loader won't prompt to select a version.
Reboot your machine and check that rEFInd has two new entries for Windows 10 and Windows 11 and check they both boot directly into the appropriate OS.
Finishing Touches
The rEFInd menu will probably now have a total of three entries for Windows - the original one and the two you just created. To hide the original Windows boot manager just select it and press Delete. You can get it back through the hidden items menu.
Finally, if you're after a nice clean theme for rEFInd here's one I put together that includes an updated icon for Windows 11's new logo. (get it here).